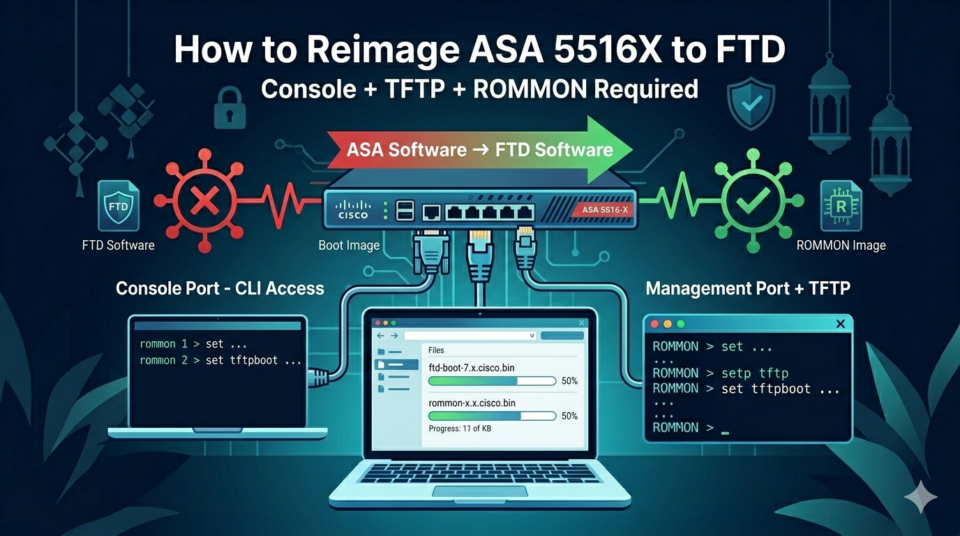
The ASA 5516X box can use ASA software and FTD software. In this post, I will share how to reimage my ASA 5516X box that used ASA software to FTD software.
We need several things ready for reimaging to be successful:
- Direct console port access.
- Management port to upload the software.
- TFTP Server
- FTD Software and boot images.
- ROMMON image, we need this if the ROMMON software is below 1.1.8.
Direct Console Port and Management Port Access
We need to connect the laptop to the console port ASA box because all the commands will be in CLI. We also need management port to be connected to the TFTP server that hosts the needed software. In this practice, I use my laptop as the TFTP server and hosts the software there.
FTD Software and Boot Images
We will reimage the ASA to FTD 6.4, so we need to download the appropriate. The software download link is here.
We need to download at least these images:
- Firepower Threat Defense boot image (ftd-boot-9.12.1.6.lfbff)
- Firepower Threat Defense install package (ftd-6.4.0-102.pkg)
As for the ROMMON software, you can download it from here.
Remember, you need to download the software with the Cisco.com login and the service contract is required. Because I work at Cisco Partner, I am entitled to download the software.
Preparation on ASA CLI
At first, you need to know the ROMMON software version on your ASA. Perform the show module command on ASA CLI:
ciscoasa# sh module

Mod  Card Type                                    Model              Serial No.
---- -------------------------------------------- ------------------ -----------
   1 ASA 5516-X with FirePOWER services, 8GE, AC, ASA5516            ############
 sfr Unknown                                      N/A                ############

Mod  MAC Address Range                 Hw Version   Fw Version   Sw Version
---- --------------------------------- ------------ ------------ ---------------
   1 2c5a.####.e5aa to 2c5a.####.e5b2  1.1          1.1.8        9.8(4)12
 sfr 2c5a.####.e5a9 to 2c5a.####.e5a9  N/A          N/A

Mod  SSM Application Name           Status           SSM Application Version
---- ------------------------------ ---------------- --------------------------
 sfr Unknown                        No Image Present Not Applicable

Mod  Status             Data Plane Status     Compatibility
---- ------------------ --------------------- -------------
   1 Up Sys             Not Applicable
 sfr Unresponsive       Not Applicable
We should check the memory of the ASA with show disk0 command
ciscoasa# sh disk0:
--#--  --length--  -----date/time------  path
   41  111312736   Nov 20 2019 06:31:58  asa984-12-lfbff-k8.SPA
   42  63          Sep 24 2021 08:13:42  .boot_string
   11  4096        Nov 20 2019 06:35:36  log
   24  4096        Nov 20 2019 06:36:42  crypto_archive
   25  4096        Nov 20 2019 06:36:44  coredumpinfo
   26  59          Nov 20 2019 06:36:44  coredumpinfo/coredump.cfg
   43  26975568    Dec 13 2019 07:00:28  asdm-782-151.bin
   44  39032347    Dec 13 2019 09:36:14  anyconnect-win-3.1.14018-k9.pkg
   45  4096        Jan 01 1980 00:00:00  FSCK0000.REC
   46  28672       Jan 01 1980 00:00:00  FSCK0001.REC
   47  4096        Jan 01 1980 00:00:00  FSCK0002.REC
   48  28672       Jan 01 1980 00:00:00  FSCK0003.REC
   49  4096        Jan 01 1980 00:00:00  FSCK0004.REC
   50  32738244    Feb 22 2021 07:50:26  asdm-792-152.bin

7365472256 bytes total (7154499584 bytes free)
As we can see that the ROMMON is already up to date to version 1.1.8. Do not forget to record your activation key.
ciscoasa(config)# show activation-key
Serial Number:  ########
Running Permanent Activation Key: ######## ######## ######## ######## ########
The Running Activation Key feature: 500 AnyConnect Premium sessions exceed the limit on the platform, reduced to 300 AnyConnect Premium sessions.

Licensed features for this platform:
Maximum Physical Interfaces       : Unlimited      perpetual
Maximum VLANs                     : 150            perpetual
Inside Hosts                      : Unlimited      perpetual
Failover                          : Active/Active  perpetual
Encryption-DES                    : Enabled        perpetual
Encryption-3DES-AES               : Enabled        perpetual
Security Contexts                 : 2              perpetual
Carrier                           : Disabled       perpetual
AnyConnect Premium Peers          : 300            perpetual
AnyConnect Essentials             : Disabled       perpetual
Other VPN Peers                   : 300            perpetual
Total VPN Peers                   : 300            perpetual
AnyConnect for Mobile             : Enabled        perpetual
AnyConnect for Cisco VPN Phone    : Enabled        perpetual
Advanced Endpoint Assessment      : Enabled        perpetual
Shared License                    : Disabled       perpetual
Total TLS Proxy Sessions          : 1000           perpetual
Botnet Traffic Filter             : Disabled       perpetual
Cluster                           : Enabled        perpetual
Cluster Members                   : 2              perpetual
VPN Load Balancing                : Enabled        perpetual

The flash permanent activation key is the SAME as the running permanent key.
Now, we can start the reimaging process
Reimaging Process
Reload the ASA, and press ESC to interrupt the boot and enter ROMMON mode
Enter these parameters to connect the ROMMON and the laptop
rommon 2 > address 10.0.0.1
rommon 3 > netmask 255.255.255.0
rommon 4 > gateway 10.0.0.2
rommon 5 > server 10.0.0.2
rommon 6 > ping 10.0.0.2
Sending 10, 32-byte ICMP Echoes to 10.0.0.2 timeout is 4 seconds
!!!!!!!!!!
Success rate is 100 percent (10/10)
rommon 7 > file ftd-boot-9.12.1.6.lfbff
rommon 8 > sync
rommon 9 > tftpdnld
             ADDRESS: 10.0.0.1
             NETMASK: 255.255.255.0
             GATEWAY: 10.0.0.2
              SERVER: 10.0.0.2
               IMAGE: ftd-boot-9.12.1.6.lfbff
             MACADDR: 2c:5a:0f:79:e5:aa
           VERBOSITY: Progress
               RETRY: 40
          PKTTIMEOUT: 7200
             BLKSIZE: 1460
            CHECKSUM: Yes
                PORT: GbE/1
             PHYMODE: Auto Detect
Receiving ftd-boot-9.12.1.6.lfbff from 10.0.0.2!!!!!!!!!!!!!!!!!!!!!!!!!!!!!!!!!!!!!!!!!!!!!!!!!!!!!!!!!!!!!!!!!!!!!!!!!!!!!!!!!!!!!!!!!!!!!!!!!!!!!!!!!!!!!!!!!!!!!!!!!!!!!!!!!!!!!!!!!!!!!!!!!!!!!!!!!!!!!!!!!!!!!!!!!!!!!!!!!!!!!!!!!!!!!!!!!!!!!!!!!!!!!!!!!!!!!!!!!!!!!!!!!!!!!!!!!!!!!!!!!!!!!!!!!!!!!!!!!!!!!!!!!!!!!!!!!!!!!!!!!!!!!!!!!!!!!!!!!!!!!!!!!!!!!!!!!!!!!!!!!!!!!!!!!!!!!!!!!!!!!!!!!!!!!!!!!!!!!!!!!!!!!!!!!!!!!!!!!!!!!!!!!!!!!!!!!!!!!!!!!!!!!!!!!!!!!!!!!!!!!!!!!!!!!!!!!!!!!!!!!!!!!!!!!!!!!!!!!!!!!!!!!!!!!!!!!!!!!!!!!!!!!!!!!!!!!!!!!!!!!!!!!!!!!!!!!!!!!!!!!!!!!!!!!!!!!!!!!!!!!!!!!!!!!!!!!!!!!!!!!!!!!!!!!!!!!!!!!!!!!!!!!!!!!!!!!!!!!!!!!!!!!!!!!!!!!!!!!!!!!!!!!!!!!!!!!!!!!!!!!!!!!!!!!!!!!!!!!!!!!!!!!!!!!!!!!!!!!!!!!!!!!!!!!!!!!!!!!!!!!!!!!!!!!!!!!!!!!!!!!!!!!!!!!!!!!!!!!!!!!!!!!!!!!!!!!!!!!!!!!!!!!!!!!!!!!!!!!!!!!!!!!!!!!!!!!!!!!!!!!!!!!!!!!!!!!!!!!!!!!!!!!!!!!!!!!!!!!!!!!!!!!!!!!!!!!!!!!!!!!!!!!!!!!!!!!!!!!!!!!!!!!!!!!!!!!!!!!!!!!!!!!!!!!!!!!!!!!!!!!!!!!!!!!!!!!!!!!!!!!!!!!!!!!!!!!!!!!!!!!!!!!!!!!!!!!!!!!!!!!!!!!!!!!!!!!!!!!!!!!!!!!!
File reception completed.
Boot buffer bigbuf=348bd018
Boot image size = 146806912 (0x8c01880) bytes
[image size]      146806912
[MD5 signaure]    d3594f86fb102d24e3185dec0807e2a7
LFBFF signature verified.
INIT: version 2.88 booting
Starting udev
Configuring network interfaces... done.
Populating dev cache
Detected PID ASA5516.
Found device serial number JAD21030B5J.
Found USB flash drive /dev/sdb
Found hard drive(s):  /dev/sda
fsck from util-linux 2.26.2
fsck.fat 3.0.28 (2015-05-16)
0x41: Dirty bit is set. Fs was not properly unmounted and some data may be corrupt.
 Automatically removing dirty bit.
Performing changes.
/dev/sdb1: 66 files, 51505/1798211 clusters
There was an error because of ungraceful system shutdowns, so it would check the file system first.
********************************************************************************
WARNING:
     File system on Disk0 has been damaged due to ungraceful system shutdowns.
     Please wait while additional file system checks are being performed.
     Shutdown the system gracefully using the 'reboot' CLI before powering down.
********************************************************************************

Please do not power off - Running additional file system repairs ...

Filesystem has been successfully repaired.

Launching boot CLI ...
Configuring network interface using static IP
Then, the FPR will boot up, enter setup command, and setting the necessary parameters for Management interface as below, to establish temporary connectivity to the TFTP server so that you can download and install the system software package.
ciscoasa-boot>setup


                Welcome to Cisco FTD Setup
                  [hit Ctrl-C to abort]
                Default values are inside []

Enter a hostname [ciscoasa]:
ciscoasa
Do you want to configure IPv4 address on management interface?(y/n) [Y]: y
Do you want to enable DHCP for IPv4 address assignment on management interface?(y/n) [N]: n
Enter an IPv4 address [10.0.0.1]: 10.0.0.200
Enter the netmask [255.255.255.0]:
255.255.255.0
Enter the gateway [10.0.0.2]:
10.0.0.2
Do you want to configure static IPv6 address on management interface?(y/n) [N]:
N
Stateless autoconfiguration will be enabled for IPv6 addresses.
Enter the primary DNS server IP address [10.0.0.2]:
10.0.0.2
Do you want to configure Secondary DNS Server? (y/n) [n]: n
Do you want to configure Local Domain Name? (y/n) [n]: n
Do you want to configure Search domains? (y/n) [n]: n
Do you want to enable the NTP service? [N]: N
Please review the final configuration:
Hostname:               ciscoasa
Management Interface Configuration

IPv4 Configuration:     static
        IP Address:     10.0.0.200
        Netmask:        255.255.255.0
        Gateway:        10.0.0.2

IPv6 Configuration:     Stateless autoconfiguration

DNS Configuration:
        DNS Server:
                        10.0.0.2

NTP configuration:      Disabled

CAUTION:
You have selected IPv6 stateless autoconfiguration, which assigns a global address
based on network prefix and a device identifier. Although this address is unlikely
to change, if it does change, the system will stop functioning correctly.
We suggest you use static addressing instead.

Apply the changes?(y,n) [Y]: y
Configuration saved successfully!
Applying...
Restarting network services...
Done.
Press ENTER to continue...
ciscoasa-boot>
ciscoasa-boot>
ciscoasa-boot>ping 10.0.0.2
PING 10.0.0.2 (10.0.0.2) 56(84) bytes of data.
64 bytes from 10.0.0.2: icmp_seq=1 ttl=128 time=0.523 ms
64 bytes from 10.0.0.2: icmp_seq=2 ttl=128 time=0.332 ms
^C
--- 10.0.0.2 ping statistics ---
2 packets transmitted, 2 received, 0% packet loss, time 999ms
rtt min/avg/max/mdev = 0.332/0.427/0.523/0.097 ms
Then perform command system install noconfirm <url> to download the FTD system software install package
ciscoasa-boot>system install noconfirm http://10.0.0.201/ftd-6.4.0-102.pkg

######################## WARNING ############################
# The content of disk0: will be erased during installation! #
#############################################################

Do you want to continue? [y/N] y
Erasing disk0 ...
Verifying
Downloading
Extracting
Package Detail
        Description:                    Cisco ASA-FTD 6.4.0-102 System Install
        Requires reboot:                Yes

Do you want to continue with upgrade? [y]: y
Warning: Please do not interrupt the process or turn off the system.
Doing so might leave system in unusable state.

Starting upgrade process ...
Populating new system image

Reboot is required to complete the upgrade. Press 'Enter' to reboot the system.
In my case, it took around 45 minutes to reboot the FTD. After reboot, you will be in FTD CLI.
System initialization in progress.  Please stand by.
You must change the password for 'admin' to continue.
Enter new password:
Confirm new password:
You must configure the network to continue.
You must configure at least one of IPv4 or IPv6.
Do you want to configure IPv4? (y/n) [y]:
Do you want to configure IPv6? (y/n) [n]: n
Configure IPv4 via DHCP or manually? (dhcp/manual) [manual]:
Enter an IPv4 address for the management interface [192.168.45.45]: 10.0.0.1
Enter an IPv4 netmask for the management interface [255.255.255.0]:
Enter the IPv4 default gateway for the management interface [data-interfaces]:
Enter a fully qualified hostname for this system [firepower]:
Enter a comma-separated list of DNS servers or 'none' [208.67.222.222,208.67.220.220]:
Enter a comma-separated list of search domains or 'none' []:
If your networking information has changed, you will need to reconnect.

DHCP Server Disabled
The DHCP server has been disabled. You may re-enable with configure network ipv4 dhcp-server-enable
For HTTP Proxy configuration, run 'configure network http-proxy'

Manage the device locally? (yes/no) [yes]:
Configuring firewall mode to routed


Update policy deployment information
    - add device configuration
Successfully performed firstboot initial configuration steps for Firepower Device Manager for Firepower Threat Defense.


>
> show network
===============[ System Information ]===============
Hostname                  : firepower
DNS Servers               : 208.67.222.222
                            208.67.220.220
Management port           : 8305
IPv4 Default route
  Gateway                 : data-interfaces

======================[ br1 ]=======================
State                     : Enabled
Channels                  : Management & Events
Mode                      : Non-Autonegotiation
MDI/MDIX                  : Auto/MDIX
MTU                       : 1500
MAC Address               : 2C:5A:0F:79:E5:A9
----------------------[ IPv4 ]----------------------
Configuration             : Manual
Address                   : 10.0.0.1
Netmask                   : 255.255.255.0
Broadcast                 : 10.0.0.255
----------------------[ IPv6 ]----------------------
Configuration             : Disabled

===============[ Proxy Information ]================
State                     : Disabled
Authentication            : Disabled
I have an issue after reimaging that I cannot ping from my laptop to the FTD management interface (br1) and vice versa. I will write a post about that matter after this.
Hope this helps.
thanks this cleared all my doubt .. however i have one question
I see you have mentioned
system install noconfirm http://10.0.0.201/ftd-6.4.0-102.pkg
10.0.0.201 –> this is your tftp server corect
Yes, correct